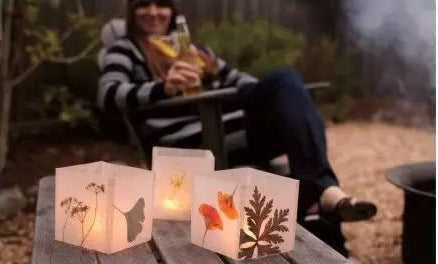
Handmade DIY-Lampshade decorated with leaves

1. Gather leaves, flowers and plants, remembering that soft, thin leaves and petals will dry faster than thicker ones. Place the petals and other materials between two paper towels and place them in a heavy book to air dry.
2. Measure and cut four 4.5-by-9-inch rectangular pieces of wax paper. You can make adjustments to cut the size you want. If you want to adjust, cut the rectangle of wax paper twice if they are the same length so they fold into a square.
3. Fold these pieces of wax paper in half into a square. Open the wax paper and put the petals or leaves inside. Close the wax paper and the petals will be sandwiched between the two layers of wax paper.
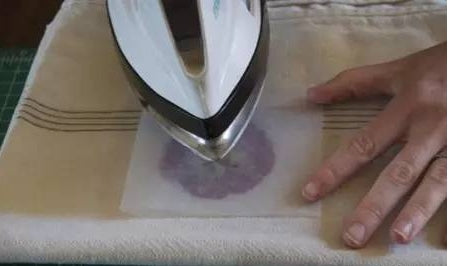
4. Place the wax paper on the ironing board or fabric, set the iron to medium and quickly iron over the wax paper to seal. This fuses the two layers of wax paper together. Repeat this step until all four squares of wax paper masking sheets are sealed.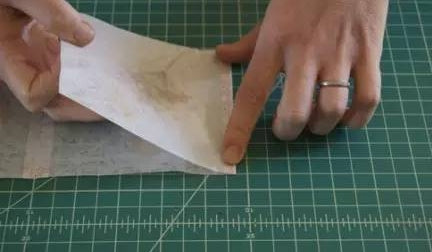
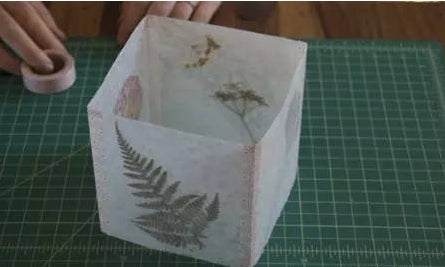
5. Place the two wax paper covers together. Adjust the cover so the side you want the outside of the paper lantern to face faces you (not the table). Cut a strip of tape an inch longer than the hood, place the tape between the edges where the two hoods touch and press it flat.
6. Turn the cover over and flatten the excess tape on the reverse side. “Close” the two panels and press your finger along the tape to make the crease a little deeper. Continue this step to connect the panels until the four panels form a cube.